Shop Blog- Please single click here to access weeks 1 through 10
- Hannah MacIntosh
- Apr 20, 2025
- 8 min read

Updated: Jun 13, 2025
Week 1:
Our group was certified to work in the machine shop.
Week 2:
We spent Shop time researching and developing an understanding of where things are currently with the development of the ceramic heater - no need to reinvent the wheel. We learned some excellent insights about what Insulated Solar Electric Cooking is and what needs to be done to improve it. We recognize the need not to expose the Nichrome wires for cooking, but have not implemented a strategy to solve the problem.
Week 3:
Our group got our hands on some clay and got to work. Amir brought in a bag of clay to share with another group working on heaters, and Hannah brought in some tools for molding the clay. All three of us started with a ball of clay, and we wedged the clay and flattened it to fit the dimensions of the cooker. We then carved into the 3 balls of clay, fixing the problem with different approaches. We had to account for the space needed for Nichrome wire, and measured the ohms of the wire before cutting it and implementing it into the design. The desired level is 6 ohms. The clay is now being left to dry and will be put in the kiln to harden soon.
Week 4:
Today we had a meeting planned with Salma to get to know each other's backgrounds and learn from his experience on what has and hasn't worked with the cookers. Something came up, so we're moving our meeting to 9 am on Friday. We pivoted and spent our shop time checking in on our ceramics and breaking open a standard electric stovetop. Another group's ceramics piece crumbled in Pete's make-shift kiln. This was probably because the clay wasn't dehydrated. We're taking note of that and won't be cooking our ceramics until we are sure it's fully dry. We're seeing if there's something we can do with the materials in the standard stovetop to implement into our design. No updates on that yet.
 |  |
 |
Week 5:
Today we planned to get started with concrete and did start it by cutting out a circle of wire grid with ½” borders as a base for the concrete to hold it together. We also shaped the nichrome wire into a coil by using a rod as a guide and twisting it around with a screwdriver. That was a pretty efficient use of materials but took a while to figure out.
David Kempken? -Head of the Ceramic Architecture department came in today and checked out the make-shift kiln. He had good advice on how to not explode our ceramics. He told us about turning the heat up gradually, so that’s what we’ll be doing over the next 9-20 hours depending on if we want to bake it up quickly or turn it back on in the morning to finish tomorrow. The kiln works by heating the nichrome wires and that bakes the ceramics from the inside out. We heat the nichrome wires by connecting them to 2 copper wires that are connected to our power source. Currently,(at 11am) our power source is at 30 watts and the kiln has an internal temperature of about 40 degrees celsius. We’ll be moving it up about 20 degrees celsius each time we come in. Amir is coming to turn the heat up at 1, Rosa is coming at 4, and Hannah is coming to turn it off for the night at 7-8pm.
 |  |  |  |


Week 6: Today was a 'learning through failure' kind of day. We started off by delegating tasks. We planned on testing the ceramic heaters, cutting out a new wire base for our cement and making a cement heater, and experimenting more with the nichrome wire and magnesium in electric stovetops. Our first hurdle was no sun, so we had to scrap testing out the ceramic heaters with solar for today. Rosa cut out the wire base for the cement, and Hannah mixed and poured the cement. It turned out pretty funky. Our first attempt is very flawed, but we learned some things. #1- about 1 cup of cement and 2-3 cups of sand is not enough. We need to mix more concrete next time. #2- The wire shape is not working. Next time, I think we can just cut out a flat circle and surround the cement with that. I think our desired slab is thin enough that we don’t need to complicate it with edges. #3- the nichrome
wire isn’t buried in the concrete and significant chunks of it are exposed (2 part flaw- not enough concrete and the nichrome wire was tied too high on the metal wire). BUT we also had some successes today- Amir learned that the inside of the electric stovetop is a 2 part coil. We can use this design to stop the corroding where 2 wires meet in the cookers. We tested that out and almost corroded it because there was an area connected to the power source that had too much resistance. Our plan is to put some concrete around that area to displace the heat.
 |  |  |  |
 |  |
Week 7:
We started off the lab by testing out our ceramic heater to see how it would work. We got one of them running with around 50 Watts going through it. The other heater, we saw sparks coming out through the connection so we thought that we were doing something wrong so we stopped; turns out that the connection was just not properly made so we will try again next lab week. We also checked in on our cement from last lab. It does conduct heat, but it has some major aesthetic and durability issues.
We are currently trying to solve the problem of the corrosion at the junction of the wires, and this lab we continued experimenting with the stove toppers we were using last lab. We spent a lot of time cutting the stove topper into parts that we could play around with. The stove toppers have a nicely coiled set of Nichrome wire buried in magnesium oxide to allow for the heat to dissipate quickly, making it a perfect means to help with the corrosion issues. There is still the problem of the extra wire hanging out to make the connection, so we tried putting a metal rod through the coiled Nichrome wire, then running a bunch of current through the system.
 testing out the ceramics | 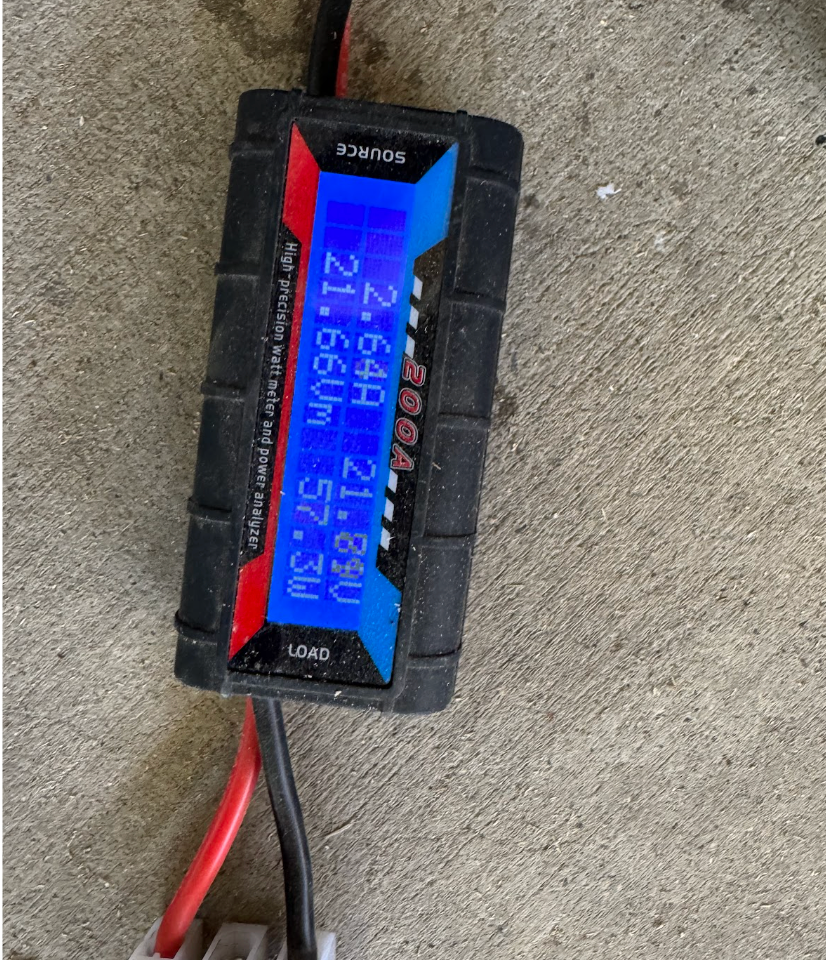 |  |
 |  |  Exposed wire and saved MgO |
Week 8:
We dedicated this lab to tackling the issue of corrosion by using part of an electric heater, with concrete around the edges. The shop techs helped us cut apart the heater, while we mixed concrete made of two parts aluminum oxide (replacing sand for better thermal conductivity) to one part cement, plus some water. We think the cement we used might have actually been mortar, which would increase the sand content. We dug out some magnesium oxide from the heater to create space for the concrete mix, then filled it in below. We also had some extra concrete mix left over, so we decided to try making a concrete heater with nichrome wire inside — but unfortunately, it cracked :(
Week 9: No lab
Week 10:
Focus: solving wire corrosion when connected to power source
Execution: cutting the stove top into about 2-3 inch pieces. We did this 4 separate times consecutively. The tools used were
1. Dremel with a flat spinning blade
2. Vice
3. Plastic bag to collect the magnesium oxide.
We worked together to cut the stove top completely, and then cut about ½ inch off of each side so that the nichrome wire inside was exposed. We then drove a thicker piece of nichrome wire into the coil of the existing nichrome wire, and crunched it down for a strong connection. The purpose of this is to connect the wires to the power source without corroding.
We split up and separately worked on different solutions for the corrosion. Hannah made a mixture of clay aluminum oxide (5:1 ratio) with added water and stuffed it into the ends of the cut piece of stove top. Rosa and Amir worked on cement with aluminum oxide (1:2 ratio) and cement with Magnesium oxide (9:1 ratio).
Next steps: dry the pieces. When they are dry, test the durability of the cement pieces. When the clay is dry, fire it and test the durability of it.
Amir came back to test our pieces on the following friday. The results are on the bottom row of photos
 |  |  |
 |  |  |
 |  |  |
Week 10 Continued-
Thursday of week 10: We mixed up batches of aluminum oxide with cement and magnesium oxide with cement. We cut apart 4 electric heater pieces and put the aluminum oxide mix on the one with tape (shown in the pictures above) and the magnesium oxide mix on the one without tape. Turns out, we needed to spend more time figuring out how to apply the concrete properly because the final result wasn’t quite what we wanted — the concrete didn’t fully cover the nichrome wire section like it should have.
We still ended up testing one of the heater pieces — the one with the aluminum oxide concrete — since the other had a broken connection somewhere in the electric heater parts. The picture below shows a really interesting heat pattern that could definitely be useful for Pete’s research students if they decide to pick this project back up. We also made one with clay used at the junction that we are yet to test. We will keep you all updated as soon as we get the results.
 |  |
Finals week (Week 11)
Tuesday: We spent the day firing in the kiln with group 3- here is a log of our data:


Wednesday:
Ceramic piece tested: Success! Our goal was to reach 10 volts with no corrosion. The heater reached 11.7 volts and 10.9 amps with no corrosion.

Comments